About me

Showing posts with label Tutorial. Show all posts

Jan 4, 2015

How I Edit My Instagram Photos

Hello!! Here my tutorial about How I Edit My Instagram Photos, I separate two blog post cuz it will be super blurry if I combined all in one blog post and will be super long, so this entry is all about editing, and previous entry is about What's on my iPhone 6 Plus, without further ado, let's get started! :) 

VSCOcam (Free) 


 Upload a Photo, Edit, Choose your filters (preset)! (I bought all the filters)
My favourite filters are S1 - S3 (for selfie)! In this photo, I decide to use S2, it made whole photo look white but my eyes are still brightening 

Afterwards, I will just go to adjust some brightening, saturation, contrast etc. 

Snapseed (Free) 
After finished STEP 1, I will open Snapseed to continues my editing 

Selective Adjust > Add Brightness 
I want my background look white, so I brighten up my background by using the Brightness, adjust by pinching screen to select which area you want to brighten. Normally I brighten all background to level +100 to whiten up my yellowish white background. So that my photo are only focus on myself. 
  
Step 2: TUNE IMAGE > Brightness > Ambiance > Sharpening 
I will add brightness +21 on this photo, and decrease Ambiance -41, Ambiance is actually for whiter and more polished photo looking, it made your photo look soft..  Last but not least, don't forget to add some sharpening effect too! :)

Youcam Makeup (Free) 
Nah, my editing is not done yet! Did you spot my eyebrows? It's unbalance caused the lightening, my ways to save my eyebrows back is using YouCam Makeup. This app is super amazing, it's can let you have flawless skin! This app even have foundation, acne remove, eye makeup, face contour, nose enhance, face reshaper and more! Download and figure it out yourself please, normally I don't smooth my skin, I use this app to edit my eyebrows or add some blusher! I know it's ridiculous! But it's works really well, no one ever ask my eyebrows is it edited. So basically, you just go to Eye > Eyebrows. There has 12 difference shapes of eyebrows to let you select, after selected your eyebrows, you can start adjust the color & shape. Color I using is grey, is more natural, and shape I only will +3, it's doesn't look FAKE nor EDITED I mean really, because if you add 100% the eyebrows will definitely looks EDITED! Let me show you!
(Sorry I put the wrong before and after) 
Before: Color +10 Shape +10 (NATURAL Like Real Eyebrows) 
After: Color +50 Shape +100 (Look Fake & Edited!!)
I hope you can understanding what I saying, spot the last "EDITED" photos you can understand all of this.. 

My editing apps is only 3 application, VSCOcam, Snapseed and Youcam Makeup 

Some photos I edited (98% Edited by VSCOcam) 
App: VSCOcam 
Preset: S2 


App: VSCOcam 
Preset: S2


App: VSCOcam 
Preset: S1 


App: VSCOcam 
Preset: SE3


App: VSCOcam 
Preset: K3 


App: VSCOcam 
Preset: KK2 

App: VSCOcam
Preset: S2 


App: VSCO cam
Preset: M5

App: VSCO cam 
Preset: S3 

Afterlight (paid) 

Afterlight also my favorite editing apps besides VSCOcam, Afterlight has tons of filters to choose, and some dusty & light leak effect. I purchased Instant Film at USD 0.99, for Polaroid Film and more light leak effect, it's a package. I love using those Polaroid Film, it's super vintage and pretty.. So I think it's worth the price. You can also add white border to posted on your Instagram without cropping your photos.. 

All the photo editing apps are Available on both the AppStore & PlayStore. Feel free to leave a comment right under this blog post if you have any feedback / suggestions! Thank you for your watching, I hope you didn't get blurry heh.. See you in next posting! :) 

Follow me on: 


What's On My iPhone 6 Plus

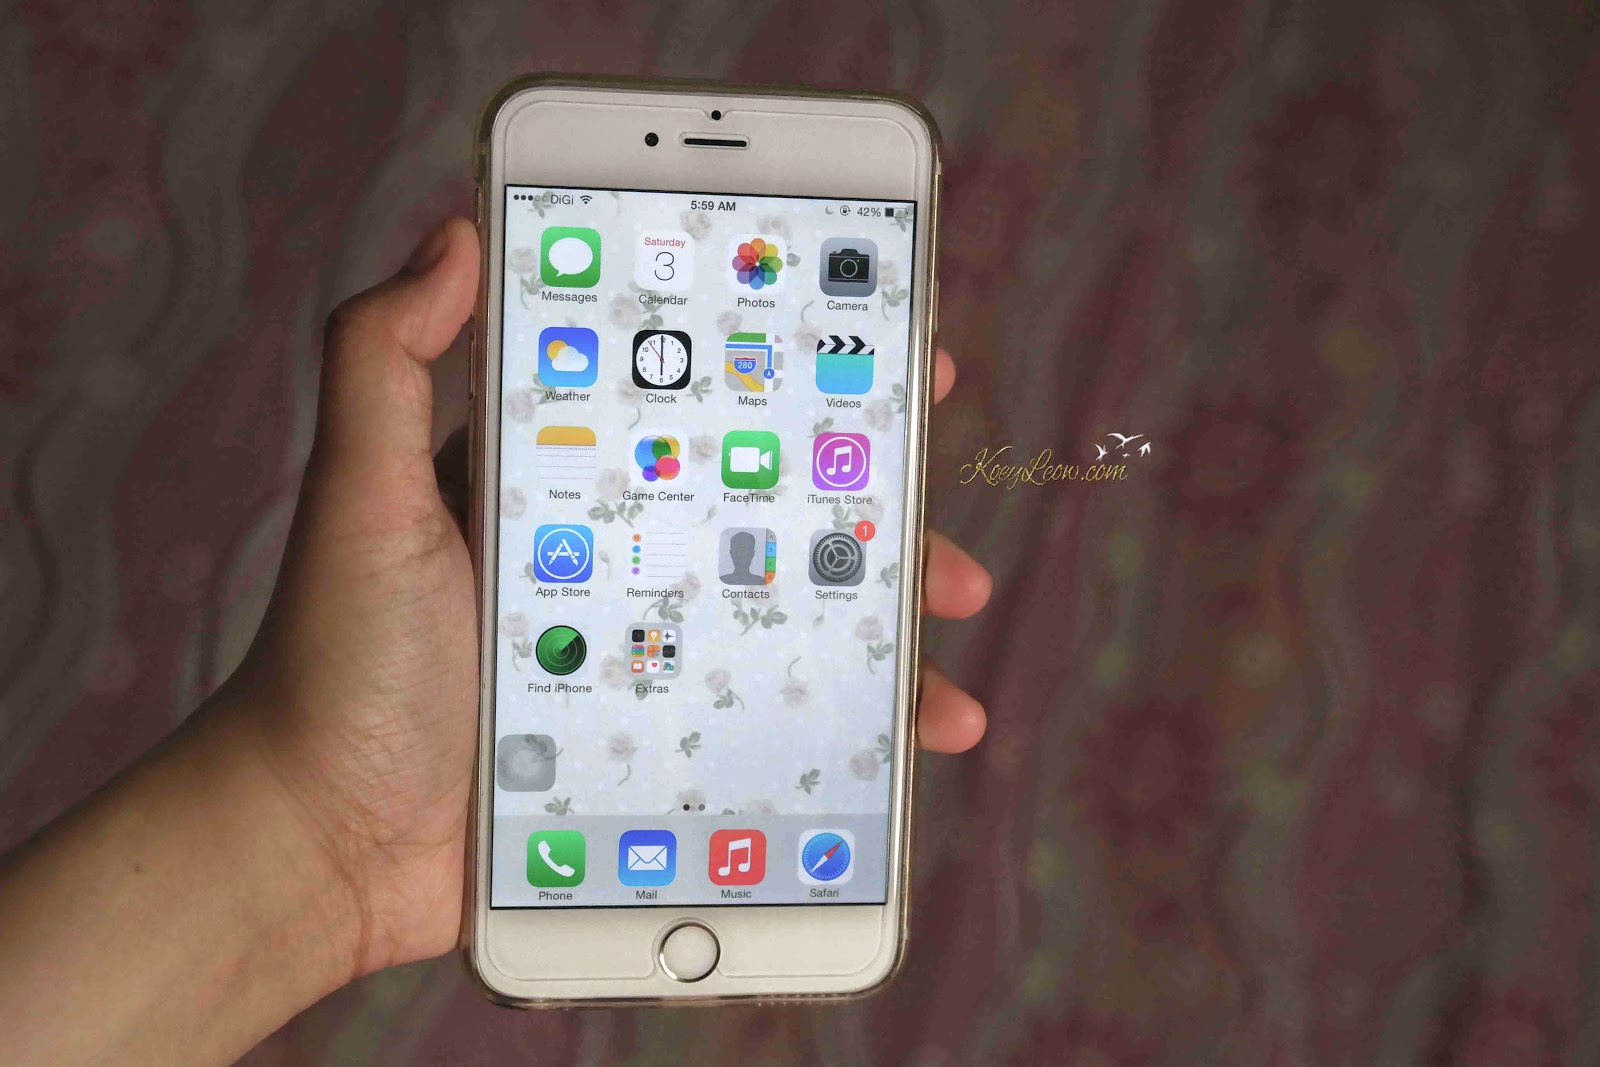
Hello, a long awaited blog post!!!! What's On My iPhone 6 Plus and How I Edit My Instagram Photos, I was thinking should I film a video to teach you guys, or write a blog post, after a long considering I decided to write a blog post for y'all (will separate in two post)! From long time ago, I've been a Samsung supporters I used to owned Samsung Galaxy S2, and Samsung Galaxy S4. Unfortunately, my Samsung Galaxy S4 screen was cracked cuz I smashed it down on floors Oops. This is not the first time my phone screen broke, so I decide not to fixing my phone screen, because it's pricey it cost almost RM400 to fix my phone screen.. I don't think it's worth so I decided to choose Apple as my next smart phone no more Samsung!! Honestly, if you used any samsung phone before you will find out how lag it will be.. gosh! Hence, I start my life without smartphone for half a year!!! I waiting for iPhone 6 to launch!!!! LOL FINALLY, IPHONE 6 HAS LAUNCHED!!! Well, I have the best dad ever in my life. Daddy bought iPhone 6 Plus for me as my birthday gift also Christmas Gift, thank you papa! Hope you guys enjoy reading, without further ado let's get started!


Oh the sexy gold baby! A transparent phone cover is a must, to protect my lovely iPhone!

First homepages 
Messages
Calender
Photos
Camera
Weather
Clock
Maps
Videos
Notes
Game Center
FaceTime
iTunes Store
App Store
Reminders
Contacts
Setting
Find iPhone 
Extras file ( apps I don't use) 

 Second Homepages (Social Media & Photography apps) 

Facebook- you know this app :P
Twitter- you know it
Instagram- my favorite social media apps, do follow me at @koeyleow
WeChat- chatting apps
Samsung Smart Camera- To transfer photos from my samsung camera
Swarm- to check-ins your locate
Youtube- You know this! HAHA
Google Translate- YOU KNOW THIS!
WhatsApp- Another Chatting app
Tumblr- Solve my boredom, some quotes and funny GIF
We Heart It- Inspiration photos or overlays etc
Pinterest- Tutorial, Celebrities, Photography, Recipes etc & more.
Weibo- kind like Facebook
Vine- Funny videos
Bloglovin- Easy to read blog
Messengers- Facebook Messengers
CocoPPa- App to customize your app icons / wallpaper
Mei You- record your menstrual date *girl apps
Kuwo Music Box- My favorite music apps! IT'S FREE
(but only available download in China so you have to open an APPLE ID in China)
Dropbox- to backup my photos
Dreamdays- Countdown apps


EDITING APPS! 


OTHERS 


Popcasts- I DONT KNOW WHAT IS THIS LOL
TGV Cinemas- to check timing and book movie ticket
GSC Cinemas- to check timing and book movie ticket
Spotify- Music App
Maybank2u- Bank app
Shazam- you can use this apps to detect songs name
Studio- Youtube App, to edit my youtube video like titles
Constellation App  
VGrab- Download VINE Video
Keepfit App 
Timberman- mini games
Shoot Moon- mini games
9GAG- funny pic / GIF
Waze- GPS 


So here is my What's On My iPhone 6 Plus! If you have any others photo editing apps want to introduce, or any fun games to play, feel free to leave me a comment right under this entry! Thank you for your watching, See you in next posting! Click here to How I Edit My Instagram Photos   

Follow me on: 

Nov 23, 2014

DIY BB CUSHION 自制气垫粉饼影片教学

不知道亲爱的读者们,有没有试用过或者目前正在使用BB Cushion呢?
有的举手!没礼物 哈哈 
BB Cushion (气垫粉饼)可说是目前最流行的东西吧!来自于泡菜国(韩国啦) 
BB Cushion之所以会红起来,是因为一部很红的韩剧【来自星星的你】女主角全智贤有使用啊d8f909e4a8e6d224b7e67446eef5ea84_w48_h48!
有追这套韩剧的宝贝们 一定不会忘了这一幕吧!陆陆续续的气垫粉饼就突然暴红了起来!
价钱也跟着飞上去,当然有品牌的都是要马币100多
而且对我来说例如IOPE, Laneige, Etude House等的气垫粉饼对我的肤色来说都太白了,
而且也没什么遮瑕能力呢d8f909e4a8e6d224b7e67446eef5ea84_w48_h48d8f909e4a8e6d224b7e67446eef5ea84_w48_h48 
有一天在淘宝的时候,淘下淘下突然想买个气垫粉饼的空盒子
买回来自己自制不是很好吗?又可以自己添加喜欢的东西进去 dbd91fcd74ea21ea631b838fd666909c_w38_h38
而且也不怕会和我自己的肤色不适合,于是就托了我朋友帮我订购了一个气垫粉饼盒子回来11a9bce1dae97b15eea1937da645ed26_w47_h4711a9bce1dae97b15eea1937da645ed26_w47_h47

气垫粉饼空盒子里面含有:
空盒子(一定的啦),粉扑,海绵,刮棒 

淘宝的店主好好哦,还附送了我两个贴纸 把我的气垫粉饼盒子弄得美美的70f87f7e354dc60510ceffc5c4da61f6_w48_h48 

自制气垫粉饼你需要:
1. 防晒产品
2. 保湿精华液 / 面霜(不黏的 要清爽的)
3. 粉底液 

以上的产品是我第一次自制气垫粉饼时候使用的,结果出来的效果 
太油腻啦!因为我用的防晒产品太油腻,而且我加太多 
Lancome的基底液我也加了很多滴啊 好心痛啊!平时都不舍得用,也把最喜欢的粉底液也加了7-9次!!f71e772d25e96e30f649228029a7feda_w48_h48f71e772d25e96e30f649228029a7feda_w48_h486e0c14253810c1f23b0ea5766ef4f657_w48_h486e0c14253810c1f23b0ea5766ef4f657_w48_h48
结果搽在脸上的时候,WTF 好油腻!!害我把那个海绵重洗了一遍 
自制第二次的时候我就没用以上的产品了 我使用了
1. YADAH Oh My Sun Block(不油腻的一款防晒 很棒!SPF35+++)
2. Kiehl's Ultra Facial Oil-Free Gel (也是一款清爽型的面霜)
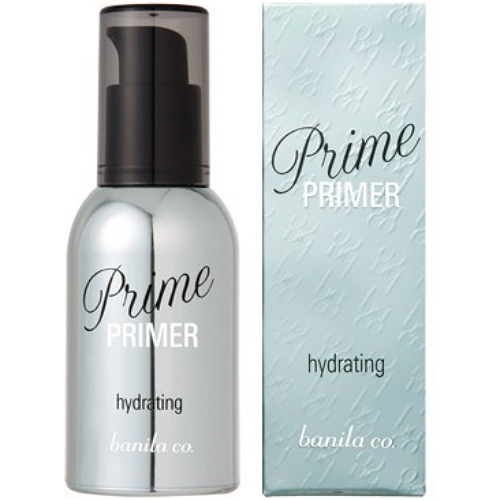
3. Banila.Co Prime Primer Hydrating (这次加了Primer) 
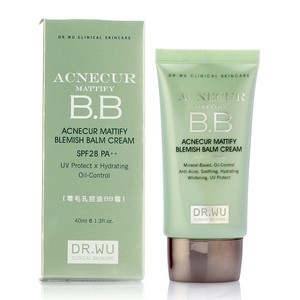
4. Dr.Wu Acnecur Mattify Blemish Balm Cream
(虽说这产品列入我Dislike Product,不过拿来用气垫粉饼还不错)
第二次重做的气垫粉饼效果就好多了,好开薰 
而且BB Cream我都死加好像不用钱哈哈,可是效果出来不错呢!真的好喜欢
最近的底妆都一直在用自制气垫粉饼,希望大家可以做做看!
超简单,不过在置入海绵之前 不妨在试试在手上看ok吗,如果觉得没问题
在大量加入粉底液等其他产品就可以了!

用后感想:
我个人觉得气垫粉饼真的是个很方便的东西,补妆迅速而且不会卡粉(都没粉哪来卡粉==)
底妆会很薄 所以对于痘痘肌肤可能不适合 f71e772d25e96e30f649228029a7feda_w48_h48f71e772d25e96e30f649228029a7feda_w48_h48f71e772d25e96e30f649228029a7feda_w48_h48
除非你一直重复拍打很多层的粉底下去 这样才会有一点的遮瑕效果 b3103d5ebf5dc068e76b4fbe420d5244_w48_h48
BB Cushion纯属是给要自然妆的女生,所以你想要自然的底妆就可以试试BB Cushion
我通常都是拿BB Cushion做我的底妆,再加一层薄薄的粉底液加强遮瑕就可以了1382697269-707942634
出门的话要补妆都是用回气垫粉饼 因为方便和迅速 


价钱:从淘宝购买回来大概是马币RM39 包括 (RM15/kg) 所以我也买了其他东西 


以上是我的影片教学,如果有什么不明白 可以留言问我哦!
谢谢观看 不妨订阅我的Youtube Channel,和给我一个LIKE 衷心感谢 
Youtube频道: 点我